I’ve noticed the same question appearing in a few groups recently – “Help! How can I create a RAG Status in Vanilla SharePoint?”. As there are a few steps involved, this led me to put together the following blog to help those in need out.
On-demand webinar: Improve Project Performance with Metrics and KPIs in SharePoint
So, let’s get started.
How to Create a RAG Status in SharePoint
1. Get your Icons
First, you’ll need to add the icons you want to use to the SharePoint site. If you don’t have any on hand, a Bing Image search for Red – Amber – Green icons can pop up some great example. Or you can just use the ones we made for you below! (right-click and select save to desktop)
Tip: We recommend using Bing for image searches, as it includes the ability to filter by license type.


If you make or source your own images, 1616 or 3232 pixels works best. Trust me – any bigger and you won’t be very popular.
2. Upload Icons to the Site Assets Library
Upload the RAG icons to your site assets library in SharePoint (remember, you can just drag and drop them into SharePoint 2013).
Then, copy the URLs and paste them into Notepad or another text editor.
3. Modify the List
Next, you need to make changes to the list where you want to include the RAG status indicators. For this example, we’ve picked a Tasks list in the out-of-the-box Project site template.
Add Choice Column
Go to the ribbon and click on List Settings and click Create Column.
Give the column a name, select Choice and enter some values in the box (leave Drop-Down Menu selected.)
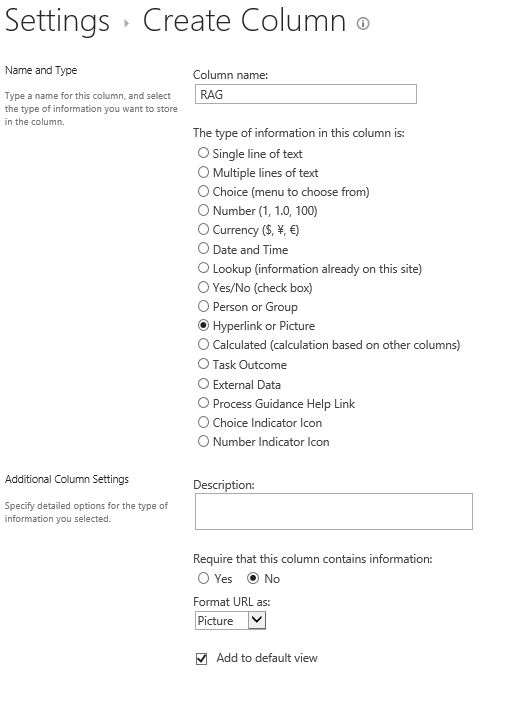
4. Add RAG Picture Column
Now you need to create another column, this time as a Hyperlink or Picture column and make sure to select Picture from the Format URL as: menu.
5. Create a Workflow
Now, to tie this all together, you need to create a workflow that will update the URL in the RAG picture column to match the status selected in the RAG Status choice column (and display the RAG icon in views!).
You need to use SharePoint Designer for this part (don’t panic – it’s easy!). Click here to download SharePoint Designer for free from Microsoft.
Create and Name Workflow
Once you have SharePoint Designer installed on your computer, click Edit List on the list toolbar to open this list in SharePoint Designer.

See here if you have any issues getting SharePoint Designer to work.
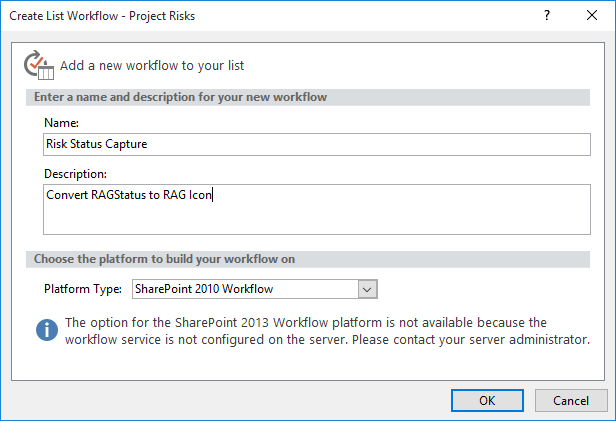
Click List Workflows to open the workflow dialog.
Give your workflow a name and description and click OK.
Create Your Variables
Next, you must create some workflow variables to store the address of the icons.
To get started, click Action | Set Workflow Variable.
Click Create a new variable to open the Edit Variable window, give it a name (e.g. Red Icon), select String and click OK.
Again select Set Workflow Variable and create a variable for the Amber Icon and Green Icon like you just did for the Red one.
Next, Click Value | … | Add or Change Lookup.
![create-new-variable3]](https://www.brightwork.com/wp-content/uploads/create-new-variable3.gif)
Select Workflow Context and Current Site URL and click OK.
Open the text file where you pasted the icon URLs and copy and paste the SiteAssets bit of the relevant URL into the window for that icon.
Repeat these steps for the other two icons.
Create an ‘If’ Statement
Next, you need to add the bit that will automatically update the image in the RAG image column based on what is selected in the RAG Status choice column. This is where SharePoint magic happens!
Click Condition | If any value equals value.
Select the picture column from the value field, click Value, then fx and select the appropriate variable as shown below.
What you’ve done here is said, If RAGStatus = Red, then set RAG = Red Icon.
Right-click on the item and select Else-if Branch or click Else-if Branch on the toolbar.

Create the step for Amber Icon as above, and then the for the Green Icon.
Click Check for Errors. You shouldn’t find any with a relatively simple workflow like this, but if you do, retrace your steps.
Click Save.
Define the Workflow Start Options
Lastly, you need to tell SharePoint when you want the workflow to run.
Click Workflow Settings.
Select the two ‘Start Workflow automatically…’ options.
Publish and Save
Click Save again and finally, click Publish.
5. RAG Status
And now you are done!!